We are glad to announce you that the Progressive Web App option is released.
As you may know lately there were many news about using and improving simple web apps according to the latest web technologies, so these will have the most of the functions a simple native application could have. A Progressive Web App (PWA) is the web application which can be installed and used as a simple native mobile application, with the possibility to be accessed offline and to be published without any store review.
Currently we would like to announce that the WebApp platform is updated and now each of the users can try to create a Progressive Web Application with many interactive features.
The list of features and options available for the PWA will be in continuous growing, as our team plans more future updates for the PWA.
Currently PWA supports these features:
About Us
Button Menu
Calculator
Circle Menu
Contact Button Menu
Slideshow
Slide
Fixed Contact Button Menu
Form
Icon menu
Author Letter HTML
Business Letter HTML
Classic Letter HTML
Head Letter HTML
Modern Letter HTML
Paper Letter HTML
Personal Letter HTML
Photo Letter HTML
Two Column Letter HTML
Visual Letter HTML
Mobile
Mobile Facebook
Mobile Linkedin
Mobile Twitter
Mosaic
Vertical Page Scrolling
Responsive menu
Interactive Feedback
PWA Menu
Map
Loyalty
Poll
Push Notification option for Progressive Web Apps is released, now you will be able to send Push Notifications to any of your PWA (Progressive Web App). For more details consider to follow this PWA Push Notifications Tutorial.
To start creating a Progressive Web Application, consider to follow one of the mentioned methods below.
Method 1. Create using a PWA Template.
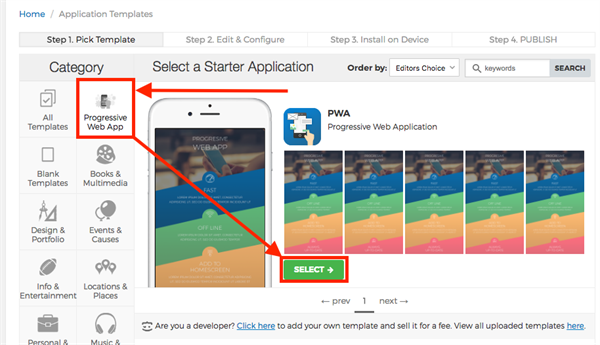
1. Go to Templates section.
2. Choose the Progressive Web App Category
3. Select the PWA template.
See the screenshot for more details:
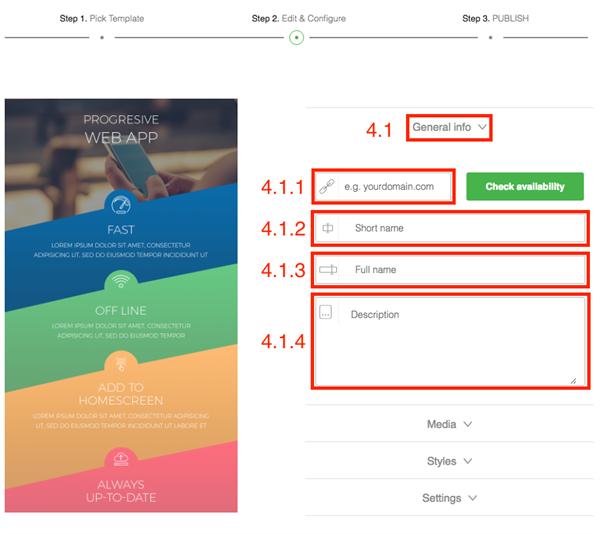
4. Edit & Configure step.
Here you will have to set the main configuration for the application.
4.1 General info
Here you will need to specify the General information related to your application.
4.1.1 Enter your domain.
Your web app will be hosted on our server. To launch it, go to your DNS hosting control panel, create a CNAME record for the specified host name and point it to the following domain: webapps.seattleclouds.com
Please make sure to set a CNAME record pointing to webapps.seattleclouds.com.
Consider not to specify websites which are already in use. If you have such consider to create a subdomain for it.
4.1.2 Enter your application Short name
4.1.3 Enter your application Full name
4.1.4 Enter your application Description
See the screenshot for more details:
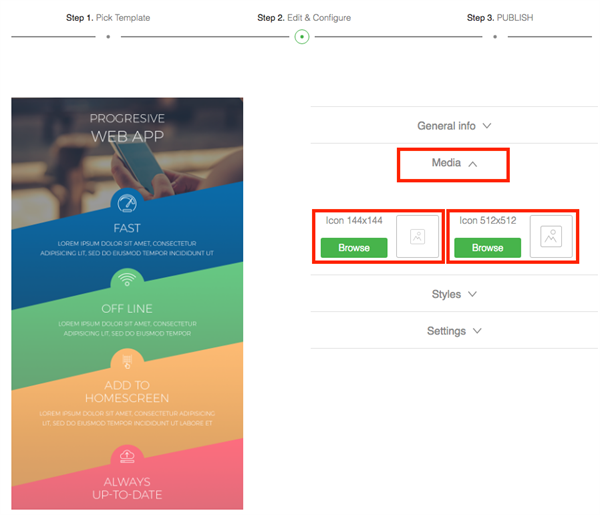
4.2 Media
Here you will need to upload the application icons
See screenshot for more details:
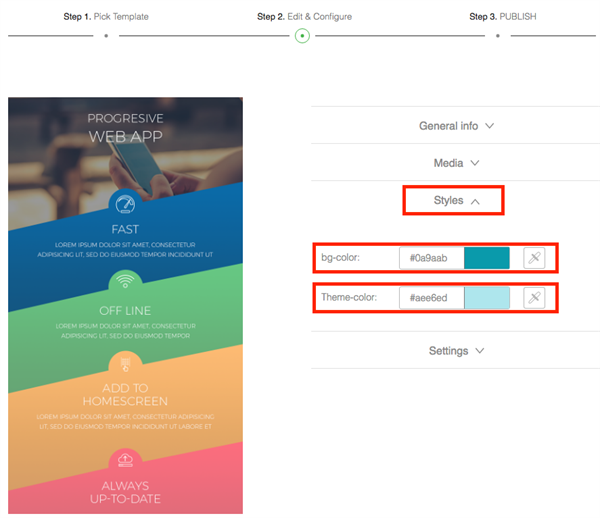
4.3 Styles
Here you can choose the Background color and the Theme color for your application.
See screenshot for more details:
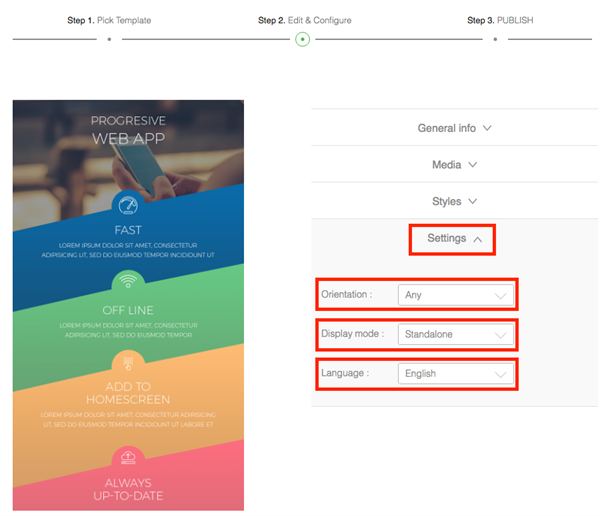
4.4 Settings
Here you will need to specify the main settings.
4.4.1 Orientation:
Any
Natural
Landscape
Landscape-primary
Landscape-secondary
Portrait
Portrait-primary
Portrait-secondary
4.4.2 Display mode:
Fullscreen - All of the available display area is used and no user agent chrome is shown.
Standalone - The application will look and feel like a standalone application.
Minimal-UI - The application will look and feel like a standalone application, but will have a minimal set of UI elements for controlling navigation.
Browser - The application opens in a conventional browser tab or new window, depending on the browser and platform.
4.4.3 Language
See screenshot for more details:
After all information and settings are specified you need to press continue. Next you will be redirected to the The PWA Editor Dashboard.
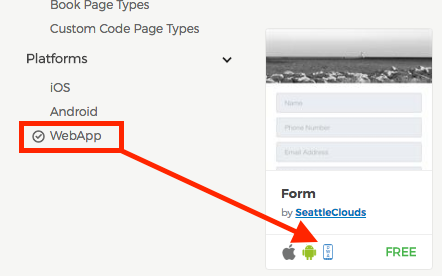
Method 2. Create a PWA using the templates from other categories.
1. Choose a template
2. Create the application using the WebApp platform.Set or Skip the Configurator step. After you have done this, make sure all the added features from the template are supported by PWA.
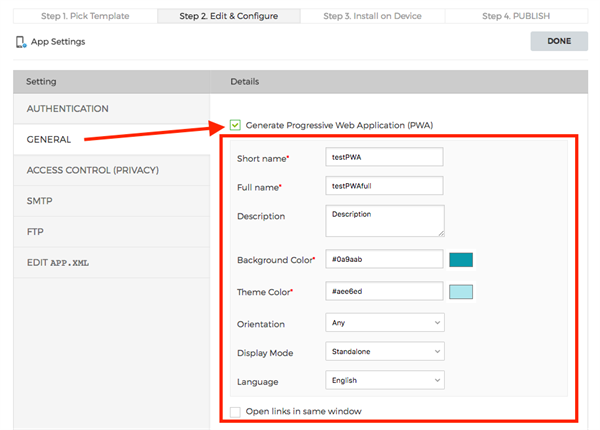
3. Enabling the Progressive Web App.
In this step to activate your PWA you will need to go to Settings.
Then in General tab you will need to enable the "Generate Progressive Web Application (PWA)" option an Save settings. After you have enabled the PWA you can proceed with the editing of your application.
4. General tab.
In General tab after enabling the PWA you can set the:
4.1 Short name
4.2 Full name
4.3 Description
4.4 Background Color
4.5 Theme Color
4.6 Orientation
4.7 Display Mode
4.8 Language
4.9 Open links in the same window
See screenshot for more details:
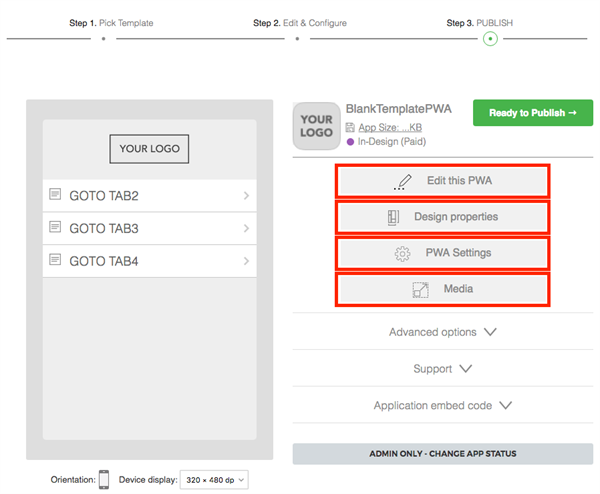
5. PWA Editor Dashboard
In this dashboard you will have access to:
5.1 Edit this PWA section.
This sections allows you to edit and add new features.
5.2 Design Properties section
In this section you will be able to change the style of your application.
5.3 PWA Settings
This section offers you all PWA options and settings.
5.4 Media Section
In this section you will be able to upload all your required icons.
See screenshot for more details:
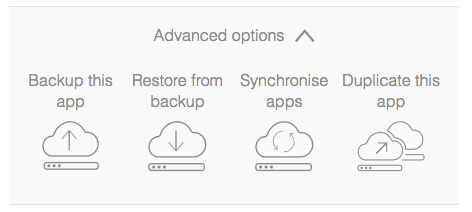
You will have also additional sections for:
5.5 Advanced options.
5.5.1 Backup this app
5.5.2 Restore from backup
5.5.3 Synchronize apps
5.5.4 Duplicate this app
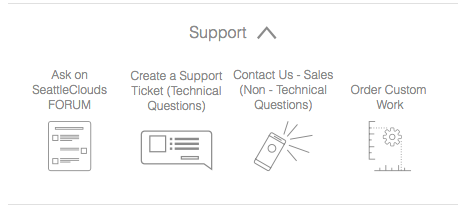
5.6 Support options.
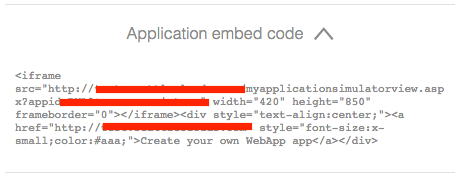
5.7 Application embed code.
Additional features for the WebApps can be found in the Market Place. Make sure to search by the WebApps platform.
See screenshot for more details:
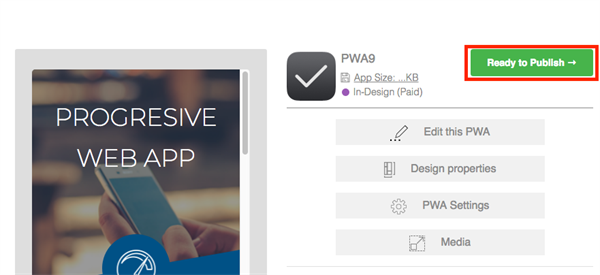
6. PWA Publishing
After you have done all the modifications and added the required content, you can proceed with publishing.
6.1 Add this application to an active plan.
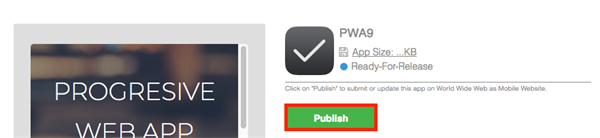
6.2 Press the Ready to Publish button in your Dashboard.
6.3 The Publish page, here proceed with the submission.
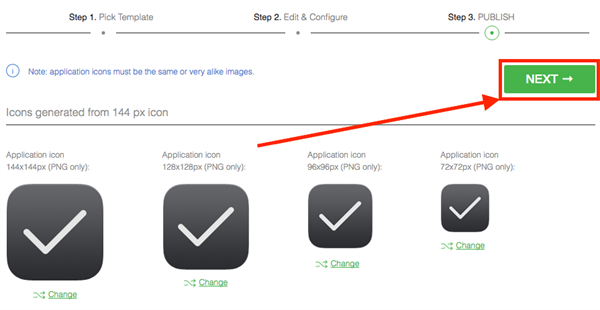
6.4 The Media page, here you will be able to upload all the required application icons and press NEXT to proceed with the submission process.
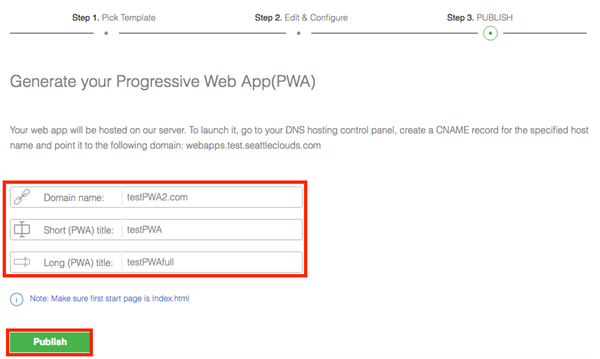
6.5 The Generate your Progressive Web App(PWA) page.
Here consider to check your Domain name, Short title, Long title.
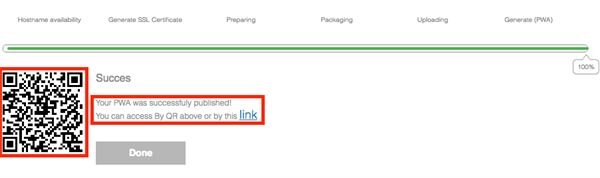
Pressing publish in this section will start the generating process of your PWA. When the process finishes a QR code and a link to your PWA will be provided.
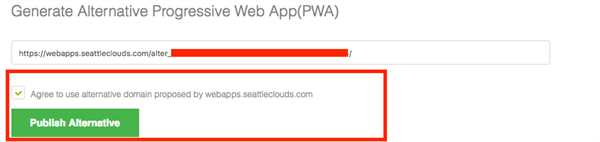
If you will not be able to generate the PWA using your own domain, an alternative link may be used in order to generate your PWA.
See screenshot for more details:
To test your application, you will need just to access this link using a browser. Some of the mobile browsers (Chrome and Firefox) may offer you to instal this PWA on your device, to access it from your home screen. A notification in the bottom of the screen will appear, with an option to add the PWA to Home Screen.
See screenshot for more details:
Not all features will be available for iOS devices and Safari. Home Screen Install and PWA Push Notifications are not available for iOS devices.
NOTE that the PWA platform will have more updates in the future and we will revise all your feedbacks on this case.
Consider to open a support ticket if you will have any related issues or questions.