In this tutorial we'll explain how to use the Login and Register feature.
Adding and editing the Login and Register page:
First of all you'll need to add the Login and Register page type from the marketplace.
Once you have added the page the Edit Section will be opened:
In this page we can add users manually or they will be added after registration.
We can set the Approve option. In this case after the registration was made, the owner of the app will have to approve the email provided by the new registered user.
All registered users which are not approved yet are shown in the Pending List.
Below this list is the section where you can add the pages or URLs which you want to be restricted.
In order to add the restriction to a page you have to add the restricted page using a link in a menu or on a tab page.
For URLs you will have to set a link direct to the Login and Register page.
Additional options:
1. Approve all registration requests - With this option owner can enable/disable automatic approve for all registration requests.
3. Register details - In this section user can specify all the required or optional details user'll have to specify during his registration.
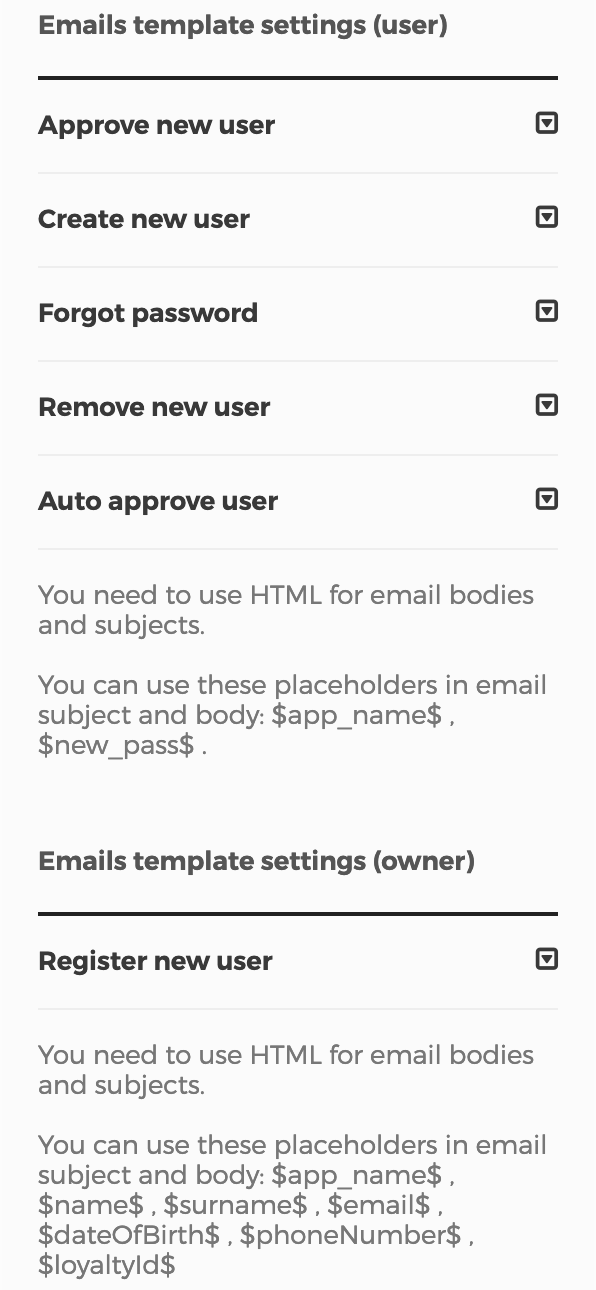
4. Email template settings (User) - In this section owner can customize email templates which are sent to the user.
4.1 Approve new user - With this option owner can customize the approve new user email template.
4.2 Create new user - With this option owner can customize the create new user email template.
4.3 Forgot password - With this option owner can customize the forgot password email template.
4.4 Remove new user - With this option owner can customize the remove new user email template.
4.5 Auto approve user - With this option owner can customize the auto approve user email template.
5. Emails template settings (Owner) In this section owner can customize email templates which are sent to the owner himself.
5.1 Register new user - With this option owner can customize the register new user email template.
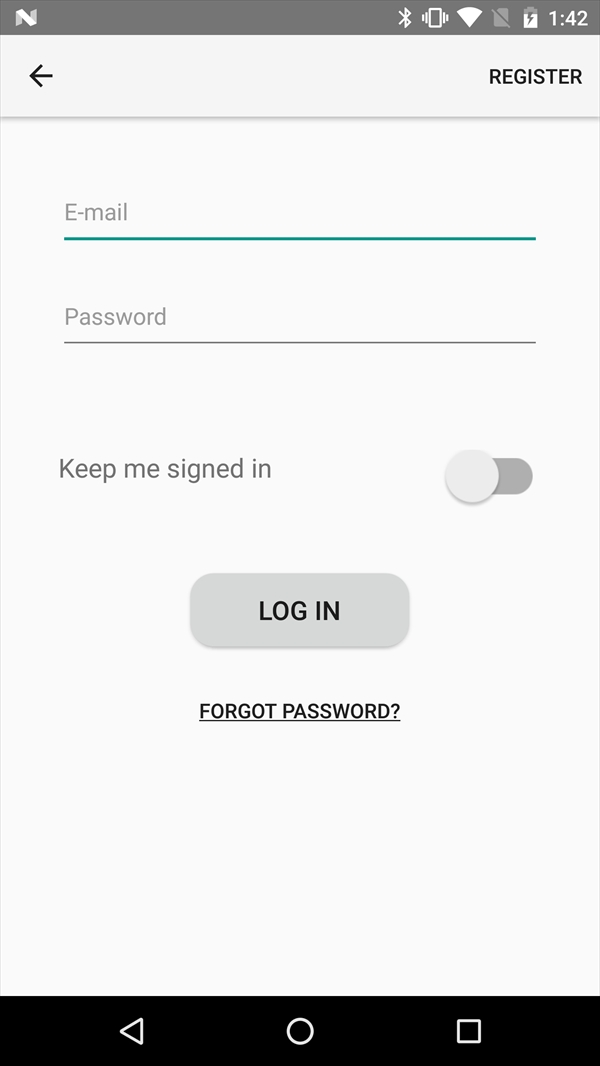
Login and Register in the application:
In the application the login and register page will launch as soon as user will access the restricted page or URL.
In this page user will be able to login, set the Keep me signed option or use the forgot password action. To prevent closing of the session while using the app, enable "Keep me signed in" option (available in profile settings and in login page). Keep me signed does not require the user to login upon each page visit. This also applies if the app was closed. User will be able to close the session only using Log Out. Password and email change do not affect this behave as the user still remains signed.
Registration page can be accessed by clicking on the Register button on left of the screen.
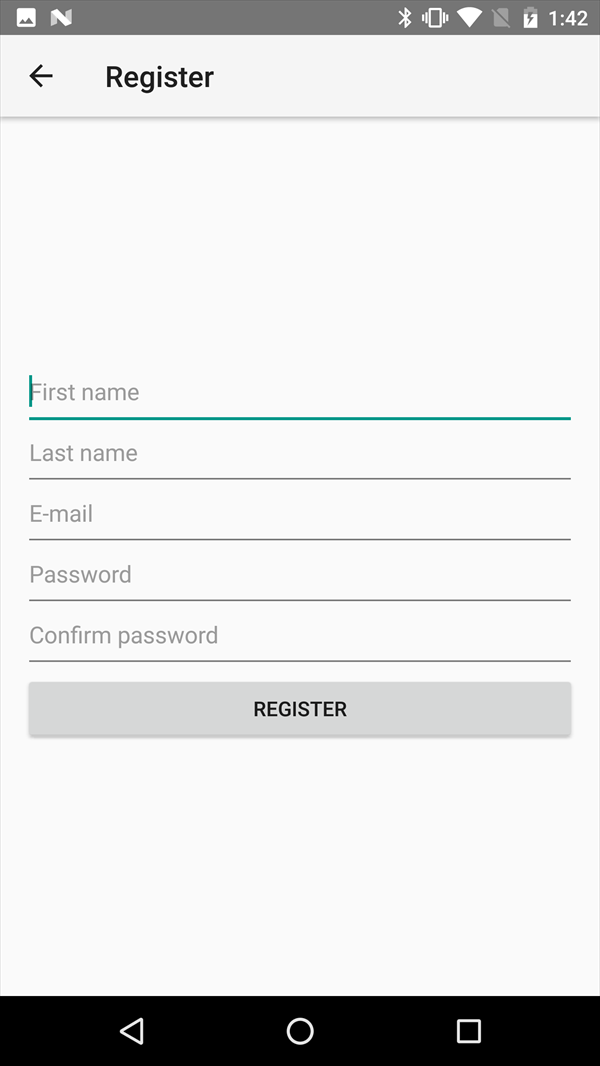
In this page user will have to fill all the required details in order to register. After registration was made owner will have to confirm this email or enable Auto approve of all registration requests. User'll receive an email confirming his registration was approved or declined.
Once registered user'll be able to login using his email.
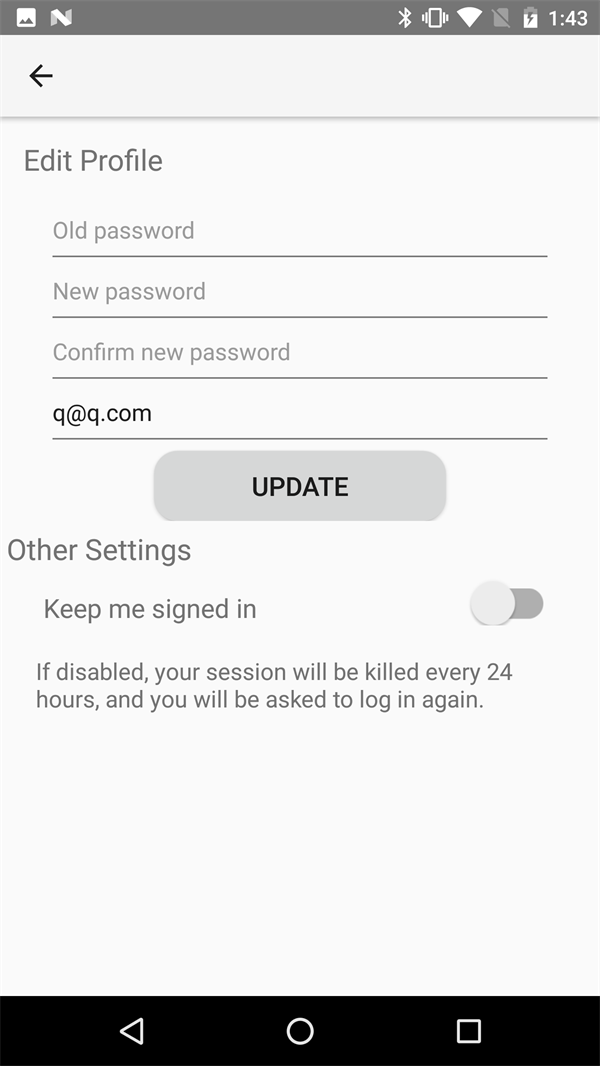
In the opened restricted page on left of the screen there will be Edit Profile and Log Out options available.
In Edit Profile page user'll be able to change the password, email, enable Keep me signed or enable Touch ID (Fingerprint)/Face ID option if these are available.
All features in edit page can be added using sync.
Note! You need to add the pages you want to restrict in Login and Register web editor. In the application you need to link the restricted page only, NOT the actual Login and Register page. The direct link to Login and Register page is required to be placed in app only if you want to restrict an URL.